The Resource Group Dialog - pgAdmin 4 1.4 documentation
Use the Resource Group dialog to create a resource group and set values for its resources. A resource group is a named, global group on which various resource usage limits can be defined. The resource group is accessible from all databases in the cluster. To use the Resource Group dialog, you must have superuser privileges. Please note that resource groups are supported when connected to EDB Postgres Advanced Server; for more information about using resource groups, please see the EDB Postgres Advanced Server Guide, available at:
The Resource Group dialog organizes the development of a resource group through the General dialog tab. The SQL tab displays the SQL code generated by dialog selections.

Use the fields in the General tab to specify resource group parameters:
- Use the Group Name field to add a descriptive name for the resource group. This name will be displayed in the pgAdmin tree control.
- Use the CPU Rate Limit (%) field to set the value of the CPU rate limit resource type assigned to the resource group. The valid range for a CPU rate limit is from 0 to 1.67772e+07. The default value is 0.
- Use the Dirty Rate Limit (KB) field to set the value of the dirty rate limit resource type assigned to the resource group. The valid range for a dirty rate limit is from 0 to 1.67772e+07. The default value is 0.
Click the SQL tab to continue.
Your entries in the Resource Group dialog generate a SQL command (see an example below). Use the SQL tab for review; revisit the General tab to make any changes to the SQL command.
Example
The following is an example of the sql command generated by selections made in the Resource Group dialog:
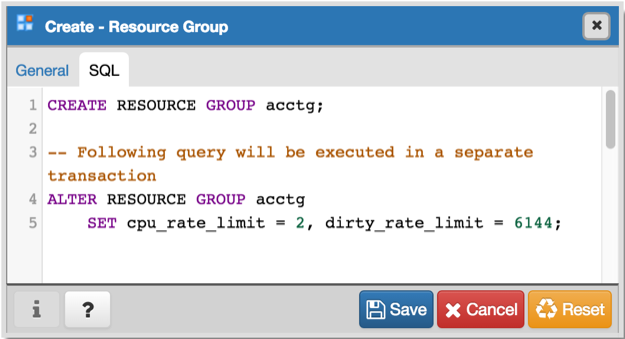
The example creates a resource group named acctg that sets cpu_rate_limit to 2 , and dirty_rate_limit to 6144 .
- Click the Info button (i) to access online help. View context-sensitive help in the Tabbed browser , where a new tab displays the PostgreSQL core documentation.
- Click the Save button to save work.
- Click the Cancel button to exit without saving work.
- Click the Reset button to restore configuration parameters.