Trigger function Dialog - pgAdmin 4 4.3 documentation
Use the Trigger function dialog to create or manage a trigger_function. A trigger function defines the action that will be invoked when a trigger fires.
The Trigger function dialog organizes the development of a trigger function through the following dialog tabs: General , Definition , Options , Parameters and Security . The SQL tab displays the SQL code generated by dialog selections.
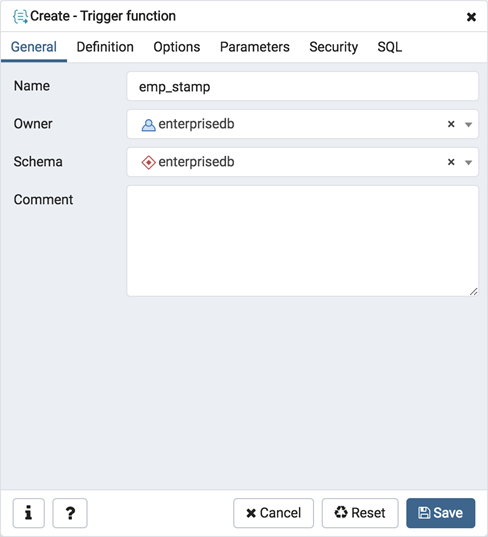
Use the fields in the General tab to identify the trigger function:
- Use the Name field to add a descriptive name for the trigger function. The name will be displayed in the pgAdmin tree control. Please note that trigger functions will be invoked in alphabetical order.
- Use the drop-down listbox next to Owner to select the role that will own the trigger function.
- Select the name of the schema in which the trigger function will reside from the drop-down listbox in the Schema field.
- Store notes about the trigger function in the Comment field.
Click the Definition tab to continue.
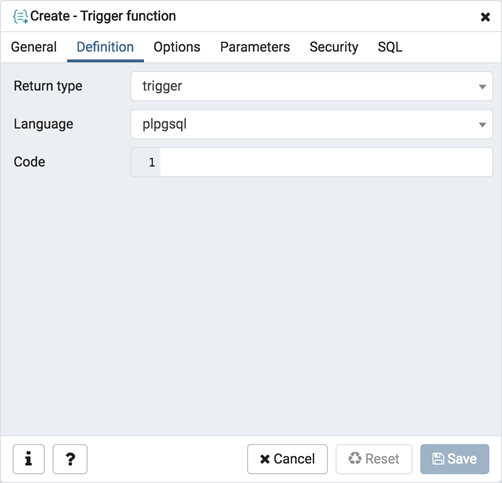
Use the fields in the Definition tab to define the trigger function:
-
Use the drop-down listbox next to Return type to specify the pseudotype that is associated with the trigger function:
- Select trigger if you are creating a DML trigger.
- Select event_trigger if you are creating a DDL trigger.
-
Use the drop-down listbox next to Language to select the implementation language. The default is plpgsql .
-
Use the Code field to write the code that will execute when the trigger function is called.
Click the Options tab to continue.
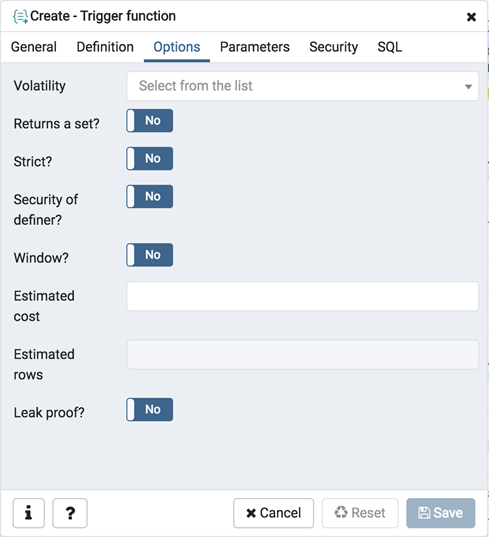
Use the fields in the Options tab to describe or modify the action of the trigger function:
-
Use the drop-down listbox next to Volatility to select one of the following:
- VOLATILE indicates that the trigger function value can change even within a single table scan.
- STABLE indicates that the trigger function cannot modify the database, and that within a single table scan it will consistently return the same result for the same argument values.
- IMMUTABLE indicates that the trigger function cannot modify the database and always returns the same result when given the same argument values.
-
Move the Returns a Set? switch to indicate if the trigger function returns a set that includes multiple rows. The default is No .
-
Move the Strict? switch to indicate if the trigger function always returns NULL whenever any of its arguments are NULL. If Yes , the function is not executed when there are NULL arguments; instead a NULL result is assumed automatically. The default is No .
-
Move the Security of definer? switch to specify that the trigger function is to be executed with the privileges of the user that created it. The default is No .
-
Move the Window? switch to indicate that the trigger function is a window function rather than a plain function. The default is No . This is currently only useful for trigger functions written in C.
-
Use the Estimated cost field to specify a positive number representing the estimated execution cost for the trigger function, in units of cpu_operator_cost. If the function returns a set, this is the cost per returned row.
-
Use the Estimated rows field to specify a positive number giving the estimated number of rows that the query planner should expect the trigger function to return. This is only allowed when the function is declared to return a set. The default assumption is 1000 rows.
-
Move the Leak proof? switch to indicate whether the trigger function has side effects. The default is No . This option can only be set by the superuser.
Click the Parameters tab to continue.
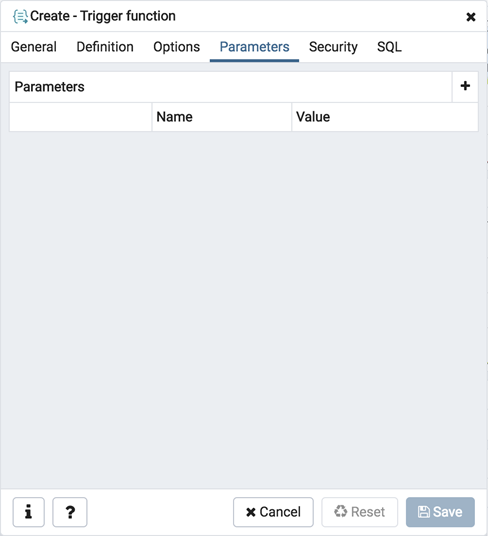
Use the fields in the Parameters tab to specify settings that will be applied when the trigger function is invoked. Click the Add icon (+) to add a Name / Value pair to the table below.
- Use the drop-down listbox in the Name field to select a parameter.
- Use the Value field to specify the value that will be associated with the selected parameter. This field is context-sensitive.
Click the Add icon (+) to set additional parameters; to discard a parameter, click the trash icon to the left of the row and confirm deletion in the Delete Row popup.
Click the Security tab to continue.
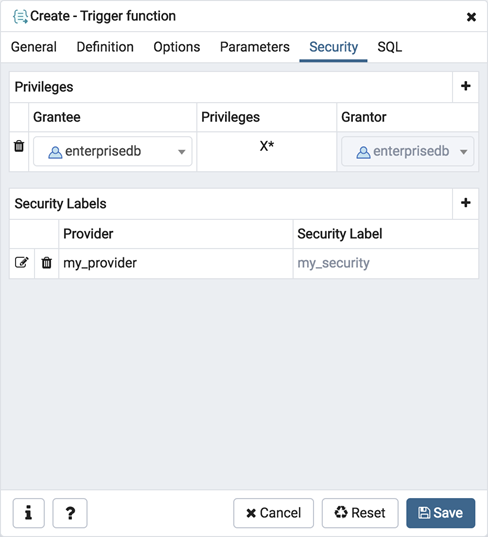
Use the Security tab to assign privileges and define security labels.
Use the Privileges panel to assign usage privileges for the trigger function to a role. Click the Add icon (+) to to add a role to the table.
- Select the name of the role from the drop-down listbox in the Grantee field.
- Click inside the Privileges field. Check the boxes to the left of one or more privileges to grant the selected privilege to the specified user.
- Select the name of a role from the drop-down listbox in the Grantor field. The default grantor is the owner of the database.
Click the Add icon (+) to assign additional privileges; to discard a privilege, click the trash icon to the left of the row and confirm deletion in the Delete Row popup.
Use the Security Labels panel to define security labels applied to the trigger function. Click the Add icon (+) to add each security label selection:
- Specify a security label provider in the Provider field. The named provider must be loaded and must consent to the proposed labeling operation.
- Specify a a security label in the Security Label field. The meaning of a given label is at the discretion of the label provider. PostgreSQL places no restrictions on whether or how a label provider must interpret security labels; it merely provides a mechanism for storing them.
Click the Add icon (+) to assign additional security labels; to discard a security label, click the trash icon to the left of the row and confirm deletion in the Delete Row popup.
Click the SQL tab to continue.
Your entries in the Trigger function dialog generate a SQL command (see an example below). Use the SQL tab for review; revisit other tabs to modify the SQL command.
Example
The following is an example of the sql command generated by user selections in the Trigger function dialog:
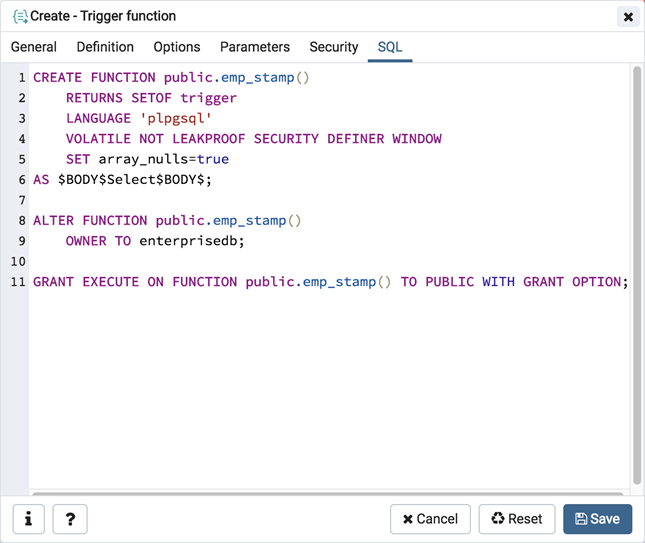
The example shown demonstrates creating a trigger function named emp_stamp that checks for a new employee’s name, and checks that the employee’s salary is a positive value.
- Click the Info button (i) to access online help. View context-sensitive help in the Tabbed browser , where a new tab displays the PostgreSQL core documentation.
- Click the Save button to save work.
- Click the Cancel button to exit without saving work.
- Click the Reset button to restore configuration parameters.